Eyeliner is one of the most transformative makeup products. Whether you prefer a subtle enhancement or a bold, dramatic flick, the right eyeliner technique can define your eyes, elevate your look, and boost your confidence. However, mastering the perfect eyeliner look isn’t always easy—uneven wings, smudging, and shaky lines can be frustrating.
If you’ve ever struggled with applying eyeliner, this ultimate guide is here to help. We’ll cover everything from choosing the right eyeliner type to step-by-step techniques, common mistakes, and pro tips for achieving flawless eyeliner every time.
Types of Eyeliner: Which One is Best for You?
Before diving into application techniques, it’s important to understand the different types of eyeliner and how they can affect your final look.
1. Pencil Eyeliner
Best for: Beginners, smudged looks, and natural definition.
- Easy to apply and blend.
- Great for the waterline and tightlining.
- Needs sharpening (unless retractable).
- Can smudge if not set with powder.
2. Liquid Eyeliner
Best for: Sharp, precise lines and bold cat eyes.
- Comes in brush-tip or felt-tip pens.
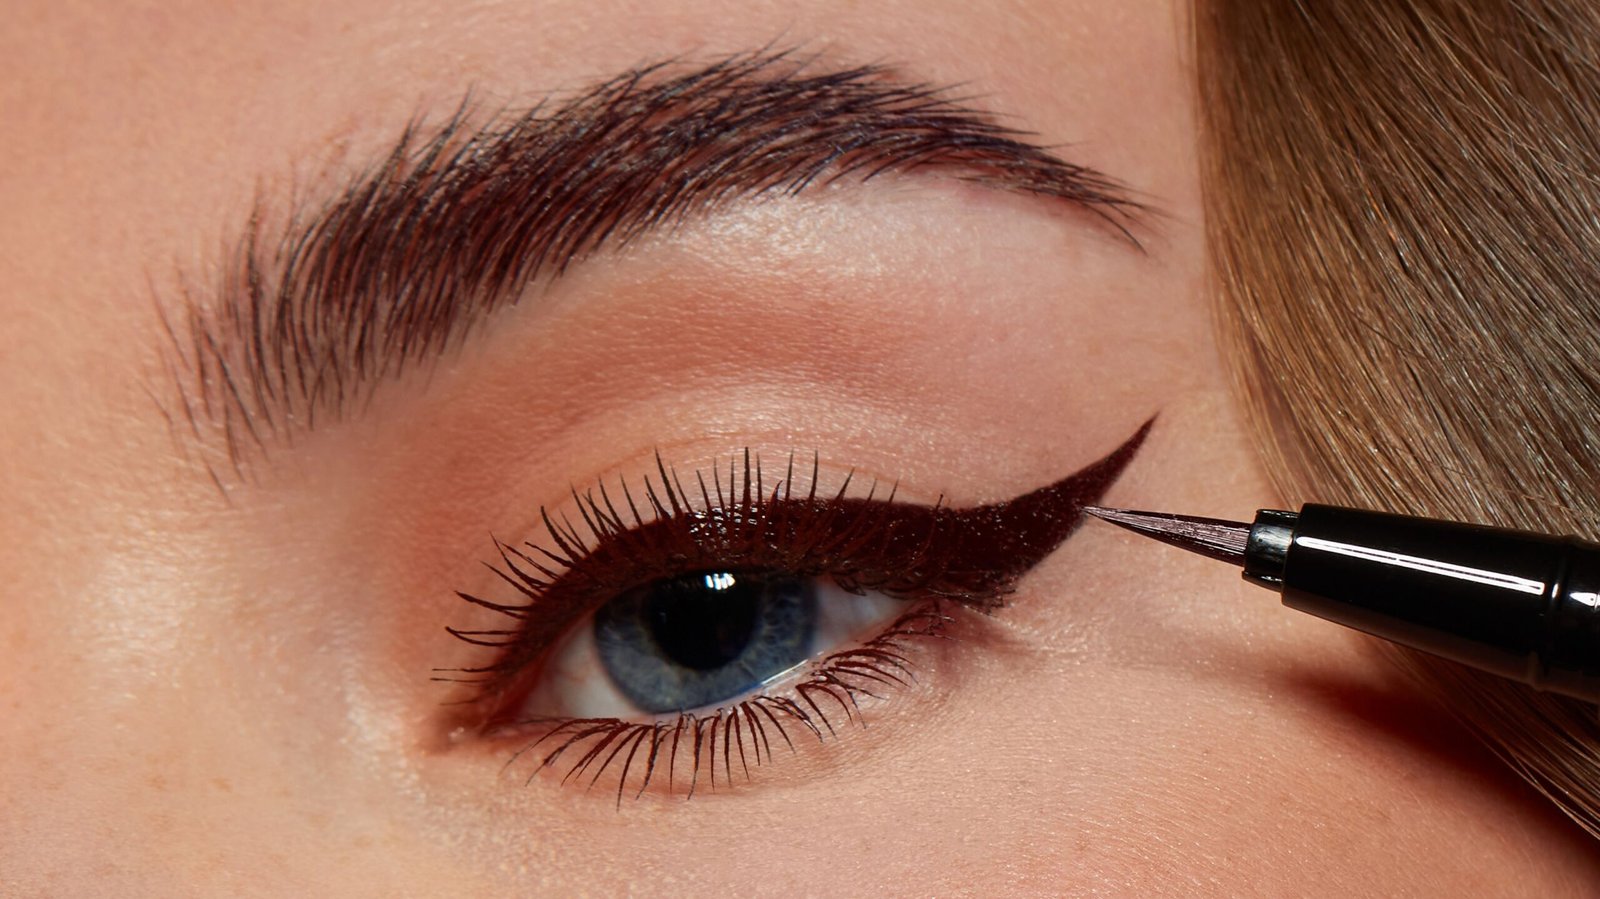
- Ideal for creating winged eyeliner.
- Requires a steady hand.
- Dries quickly but can be tricky for beginners.
3. Gel Eyeliner
Best for: Smudge-proof and long-lasting looks.
- Usually applied with an angled brush.
- Offers great control and flexibility.
- Can be used for soft or dramatic looks.
- Needs to be closed tightly to avoid drying out.
4. Eyeshadow as Eyeliner
Best for: Soft, smoky eyeliner looks.
- Provides a diffused effect.
- Works well with an angled brush.
- Not as long-lasting unless set with a primer or setting spray.
Step-by-Step Guide to Applying Eyeliner
Step 1: Prep Your Eyelids
To prevent smudging and ensure smooth application:
✅ Cleanse your eyelids to remove excess oil.
✅ Apply an eyeshadow primer to keep the liner in place.
✅ Set with a light dusting of translucent powder.
Step 2: Choose the Right Eyeliner for Your Look
Pick a pencil, gel, or liquid liner depending on the style you want. If you’re a beginner, start with a pencil or gel liner before attempting liquid eyeliner.
Step 3: Create a Guide with Dots or Dashes
Instead of drawing one continuous line, dot or dash along the lash line as a guide. Then, connect them for a smooth, even application.
Step 4: Start Thin and Build Up
It’s easier to start with a thin line and gradually thicken it than to correct a line that’s too thick. Keep the line as close to your lash line as possible for a natural look.
Step 5: Perfect the Wing (Optional)
For a classic winged eyeliner:
✅ Use a piece of tape or a business card as a guide for the perfect angle.
✅ Draw a small flick upwards from the outer corner of your eye.
✅ Connect the wing to the main lash line, creating a triangle shape.
✅ Fill in the wing and refine the edges for a sharp finish.
Step 6: Tightline for a Fuller Lash Effect
If you want fuller-looking lashes without a bold eyeliner look, apply pencil liner to the upper waterline (tightlining) to create the illusion of thicker lashes.
Step 7: Set Your Eyeliner (For Longevity)
- For pencil or gel liners, set with a matching eyeshadow to prevent smudging.
- If using liquid eyeliner, ensure it’s fully dry before blinking.
Eyeliner Looks for Different Eye Shapes
Your eye shape plays a huge role in how eyeliner looks on you. Here’s how to enhance your natural features:
1. Almond Eyes
🔹 Most eyeliner styles suit almond eyes! Try a classic wing or a bold cat-eye to enhance your shape.
2. Hooded Eyes
🔹 Apply eyeliner slightly above the lash line so it remains visible when your eyes are open.
🔹 Opt for thin wings that extend outward rather than thick lines that get hidden.
3. Round Eyes
🔹 Elongate round eyes by extending the wing outward and slightly upward.
🔹 Avoid thick lines all around the eye, as they can make eyes look smaller.
4. Monolid Eyes
🔹 Tightlining is key to defining monolid eyes without overpowering them.
🔹 Try a bold winged liner for a striking effect.
5. Downturned Eyes
🔹 Focus on a subtle flick or an upward wing to lift the eyes.
🔹 Avoid heavy lower eyeliner, as it can accentuate the downward slant.
Common Eyeliner Mistakes (And How to Fix Them!)
🚫 Uneven Wings → Use tape or a guide for symmetry.
🚫 Shaky Lines → Rest your elbow on a flat surface and use small strokes instead of one long line.
🚫 Smudging Throughout the Day → Set your eyeliner with powder or choose waterproof formulas.
🚫 Liner Transferring to Upper Lid → Apply eyeshadow primer and use a long-lasting eyeliner formula.
🚫 Struggling with Liquid Liner → Use a pencil liner first to outline your wing, then trace over it with liquid liner.
Pro Tips for a Flawless Eyeliner Look
✔️ Warm Up Your Pencil Eyeliner – If your liner feels stiff, rub it on the back of your hand to soften it before applying.
✔️ Use Concealer to Fix Mistakes – Clean up messy edges with a small brush and concealer for a crisp, polished finish.
✔️ Experiment with Colors – Black is classic, but brown, navy, or colorful eyeliners can enhance different eye colors.
✔️ Try Different Angles – Adjust the angle of your wing according to your face shape for the most flattering look.
✔️ Invest in a Good Brush – If using gel eyeliner, an angled brush can make application easier and more precise.
Final Thoughts
Achieving the perfect eyeliner look takes practice, but with the right techniques and tools, anyone can master it. Whether you prefer a classic wing, a smudged-out smoky liner, or a bold graphic style, eyeliner is a powerful way to define and enhance your eyes.
Now that you have this ultimate guide, grab your favorite eyeliner and start experimenting with different styles! Which eyeliner look will you try next?
